
Common Mistakes People Make When Designing Built-In Braais
- Harry Oelofse

- Nov 17, 2025
- 3 min read
🔥 The Secret Ingredients: What People Forget When Designing a Built-In Braai
A built-in braai (or barbecue) is more than just a grid over hot coals—it's the heart of South African outdoor living. It's the centerpiece for entertaining, relaxation, and, of course, delicious food. While most people remember the essentials (the chimney, the firebox, and the grid), there are several crucial details that often get overlooked during the planning phase.
Ignoring these can turn your dream braai area into a frustrating one. Let's dive into the four most important things people often forget that make a massive difference in convenience and functionality.
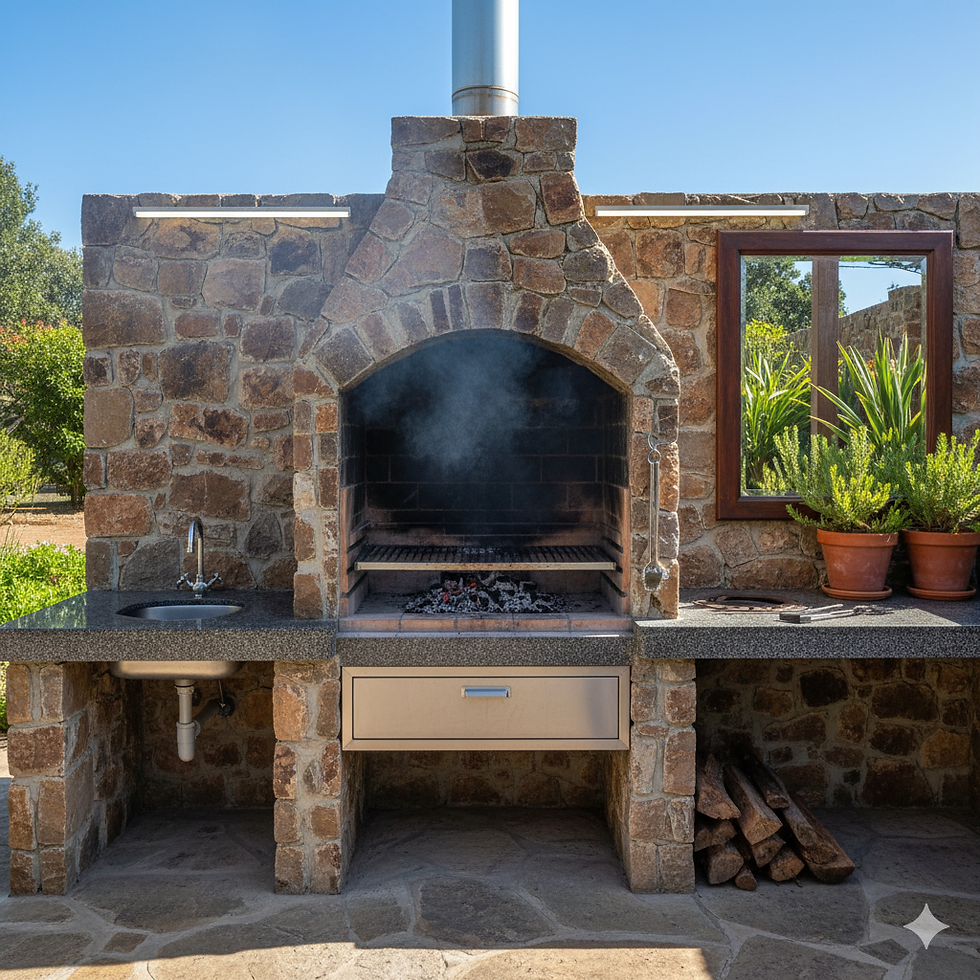
1. The Often-Forgotten Counter Space 🥩🔪
The single biggest mistake people make is underestimating the need for adequate counter space immediately next to the braai.
The Prep Zone: You need space to transfer marinaded meat from a tray to the grid, or to hold a cutting board for slicing bread or prepping vegetables while the fire is going. A small ledge simply won't cut it. Aim for a section of counter that is at least $60 \text{ cm}$ wide on one or both sides.
The Landing Zone: Once the meat is perfectly cooked, you need a clean, heat-safe surface to place your serving platter. Trying to balance a sizzling, heavy grid of food on a tiny space is a recipe for disaster.
🔥 Pro-Tip for Convenience: If space allows, incorporate a drop-down or slide-out stainless steel work surface on one side. It provides extra space when needed and tucks away neatly afterward.
2. Strategic Lighting: See What You're Cooking 👀💡
Cooking in the dark is a terrible experience. Flames cast dramatic shadows, making it nearly impossible to judge the internal temperature or the char on your meat accurately.
Task Lighting is Key: Forget general overhead lighting. You need a dedicated, focused task light (or lights) that shine directly onto the cooking surface and the preparation counter.
Placement Matters: The light fixture should be placed slightly in front of the braai master's head to prevent your own shadow from falling over the grid.
Heat & Weather Resistance: Ensure the light fixtures are rated for high heat and outdoor (IP-rated) use. Standard indoor lights will quickly fail or melt.
🔥 Pro-Tip for Convenience: Look for a flexible or adjustable LED spotlight mounted underneath the chimney canopy. They consume little energy and offer bright, cool-white light, which is excellent for color perception.
3. Ash Disposal and Cleaning Access 🧹🗑️
The aftermath of a great braai is the cleanup—and nobody enjoys wrestling with a shovel and dusty coals.
The Ash Drawer/Pan: This is a non-negotiable convenience item. Ensure your built-in unit has a sturdy, easily removable ash pan or drawer accessible via a small door at the bottom of the firebox. This allows you to simply rake the cold ash down and slide out the tray for disposal.
Easy Access to the Flue: Over time, soot and creosote build up in the chimney flue, which can reduce draft and, in extreme cases, become a fire hazard. A small access panel (a removable section of the flue) allows for easy annual cleaning with a flue brush.
🔥 Pro-Tip for Convenience: Place a dedicated, fire-safe metal container near the braai to hold the removed ash pan. Always let the ash cool completely (ideally 24-48 hours) before disposing of it.
4. Storage Solutions for Tools and Fuel 🪵⚙️
A cluttered braai area is an annoying braai area. Where do the tongs, gloves, firelighters, and wood/charcoal go?
Integrated Log Storage: If you use wood, integrating a neat, ventilated, and covered storage alcove directly below the firebox is incredibly convenient. It keeps your fuel dry and instantly accessible.
Drawer for Essentials: Dedicate one closed drawer or cupboard beneath the counter for all your braai tools (tongs, flipper, basting brush, thermometer, gloves, etc.). Keeping them right where you use them saves countless trips back and forth to the kitchen.
Hooks: Install a simple rail with S-hooks on the side of the braai structure. This is perfect for hanging long-handled tools and a fireproof glove.
🔥 Pro-Tip for Convenience: Consider a small, lockable gas storage compartment if you plan on using a gas side-burner or a gas lighter (like the $Cadac \text{ } gas \text{ } pokers$). Safety and accessibility in one spot!
Designing a built-in braai is an investment in your lifestyle. By focusing on these often-overlooked details—counter space, lighting, cleaning access, and storage—you won't just build a braai; you'll build a perfectly efficient and convenient outdoor kitchen that you'll enjoy for years to come.


Comments